🔥 LIMITED-TIME GRAND OPENING OFFER · FREE STANDARD SHIPPING · DUTIES & TAXES INCLUDED

How to Install a Car Screen Protector Without an Alignment Tray

👉 Installing a Screen Protector with an Auto-Alignment Tray
Installing a tempered-glass screen protector manually does not have to be difficult. This general car screen protector installation guide explains how to clean the display, align the glass and smooth out trapped air when you are using a standard manual installation method.
This guide can be useful for many vehicle displays, including Tesla Model 3 and Model Y screens. However, installation tools and package contents vary by product. If your protector includes an Auto-Alignment Tray, follow the dedicated tray installation guide linked above.
For the best result, work slowly in a clean environment and follow the instructions supplied with your specific screen protector.
Watch the Manual Installation Video
What You Will Need
Prepare the following items before starting:
- A screen protector that matches your vehicle and display size
- A screen-cleaning kit, such as a wet wipe and microfiber cloth
- Dust-removal stickers
- A clean plastic card or supplied squeegee for smoothing the glass
- A clean, stable installation area with limited airflow
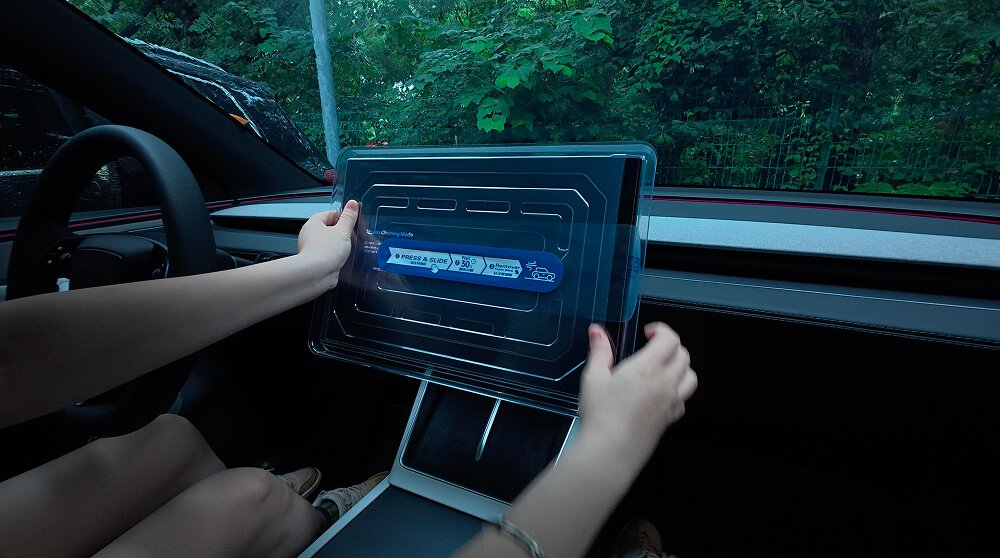
Some Autolind Tesla Model 3 and Model Y products also include a model-specific Auto-Alignment Tray with a dust-control chamber, together with a squeegee and screen-cleaning kit. If your package includes these tools, use the dedicated tray guide instead of this manual method.
5 Steps for Manual Car Screen Protector Installation
Step 1: Prepare the Display
Park the vehicle in a clean location and avoid strong airflow while you work. If your vehicle supports it, enable Screen Clean Mode to reduce accidental touch input and make surface dust easier to see.
Use the supplied wet wipe to remove fingerprints, oils and residue. Dry the display completely with the microfiber cloth.
Step 2: Remove Remaining Dust
Use the dust-removal stickers to lift particles from the centre, corners and edges of the glass. Inspect the display from different angles before continuing.
Tip: Careful cleaning is one of the most important parts of manual car screen protector installation. A particle left beneath the glass may create a visible spot or air pocket.
Step 3: Partially Remove the Release Film
Hold the protector by its edges and identify the adhesive side. Peel back approximately half of the release film while keeping the exposed adhesive away from dust and fingerprints.
Do not touch the adhesive surface with your fingers. If the product instructions recommend a different method, follow those instructions.
Step 4: Align and Apply the Glass
Align the exposed section with the top and side edges of the display. Check the corners carefully before allowing the glass to make contact with the screen.
Once the first section is positioned, slowly pull away the remaining release film while allowing the glass to settle gradually across the display.
Step 5: Smooth Out Trapped Air
Use the supplied squeegee or a clean plastic card wrapped in a microfiber cloth. Starting near the centre, apply light, even pressure and move trapped air toward the nearest edge.
Do not press aggressively or use sharp objects on the glass. If a visible spot remains, inspect the area to determine whether it is trapped air or dust beneath the protector.
Common Installation Mistakes to Avoid
- Installing in a dusty or windy environment
- Touching the adhesive side of the protector
- Skipping the dust-removal step
- Aligning only one edge and ignoring the corners
- Using excessive pressure while removing air
- Choosing a protector without confirming the display size
After Installation
Inspect the perimeter of the glass and check that the edges are seated evenly. Avoid repeatedly lifting the protector once it has begun bonding to the display.
Small air pockets may change as the adhesive settles. If a pocket remains, use gentle pressure with the squeegee and follow the product instructions.
Frequently Asked Questions
Can I use this guide with an Auto-Alignment Tray?
This article explains a general manual method. If your product includes an Auto-Alignment Tray, use our Auto-Alignment Tray installation guide instead.
Why does dust appear beneath the screen protector?
Dust can remain on the display before installation or enter the work area while the adhesive surface is exposed. Careful cleaning and a low-airflow environment can help reduce this risk.
Can I use a credit card to remove air?
A clean plastic card may be used if the product does not include a squeegee. Wrap it in a microfiber cloth and apply gentle pressure from the centre toward the edge.
How do I choose the correct screen protector?
Confirm your vehicle model, screen size and glass geometry before ordering. Tesla Model Y owners can use our Tesla Model Y screen size guide to compare 15.4-inch and 16-inch displays.
Choose the Correct Protector Before Installing
Autolind offers screen protectors for selected Tesla displays. Check the product page for the latest compatibility information and package contents.
- Tesla Model Y 15.4-inch screen protector
- Tesla Model Y 16-inch screen protector
- Tesla Model 3 screen protector
Need help confirming compatibility? Contact Autolind support with your vehicle version and a clear photo of the display before ordering.
Autolind is an independent automotive-accessories brand and is not affiliated with, endorsed by or sponsored by Tesla, Inc.